Woodworking Tips that Will Have You Comfortably Crafting Like a Pro
This post may contain affiliate links to products we personally use and love.
Whether you are an avid DIYer or have always wanted to get into woodworking, learning how to work with wood is not as challenging as you would think. With these five proven tips, shared by Paul from Woodwork Boss, you can start learning how to woodwork like as a professional, even as a beginner. You don’t need all the fancy tools, just a willingness to learn. And, these tried and true tricks will definitely put you on the fast track to some awesome wood creations.
Woodworking is a wonderful skill to acquire. Even an amateur woodworker can accomplish many practical things, such as making a bench for the garden, framing an odd-sized painting, or fixing a broken drawer.
For centuries, wooden items were created with only hand tools. Nowadays, power tools make the work go quicker with less elbow grease. A lot of projects these days are accomplished with a combination of hand tools and power tools.
Choosing the right project is very important to achieving early success. As with any learning experience, simple skills should be mastered before moving on to more complicated ones. Otherwise, both the final product and your satisfaction in the work will be less than what it could be.
Let’s look at five proven woodworking tips that will help you become an accomplished woodworker in the best possible way.
 Work Safely
First, you only have so many eyes, ears and fingers. Taking good care of them should take priority over any woodworking endeavor.
Even if you’re only using hand tools, wood shavings and splinters can fly around and end up in an eye. Without your sight, it would be difficult to become a talented woodworker so the first thing to focus on is eye protection.
Regular eyeglasses are not good eye protection. Wood dust can easily fly inside the frames and lenses.
Instead, get eye protection goggles from a hardware store. The goggles should fit snuggly to the sides of your face. The elastic band that keeps them on your head should be adjustable.
As you work on your projects, keep the goggles free of scratches, smudges, sap, dust, and any other obstruction that will prevent you from seeing clearly.
 Every power tool makes noise. There are several types of ear protection you can get. Some people prefer the earmuff style while others like earplugs. Either one will do – as long as you use them.
Loud noises, such as the ones produced by power tools, have been proven to cause hearing loss. Hearing aids are expensive so protect your hearing now while you still have it.
Also, bystanders need eye and ear protection, too. If someone is looking on while you work, have an extra pair of safety glasses and earplugs. And, insist that they where them.
Nearly every woodworking tool has the potential of damaging or cutting fingers. You only have 10 and they don’t grow back. So, protect your fingers with a good well-fitting pair of leather gloves.
If you have a helper that is handling the wood, he or she needs good gloves, too. Remember safety comes first, above all other woodworking tips.
Start with Simple Joints
Choosing the correct first project can make or break you as a woodworker. If you take on a project that is too ambitious, you can become bogged down in the details and the end result may not look as good as you hoped it would.
Being proud of the finished project is very important if you plan to be a good woodworker. Like any skill worth learning, it is best to start with basics and get proficient in them. Then, gradually add skills that are more difficult.
The basic butt joint is the simplest method of joinery. You can build a bench, shelf or box with just this joint.
Also, the mitered butt joint requires getting the perfect angle on the cut. When you’re ready to try it, a picture frame or shallow box are good projects.
Nobody gets these joints perfect the first time (or the first five times) so plan to practice this joint many times before you feel proficient at it.
When purchasing the wood for your project, buy a few extra boards for practicing. You can also use your practice pieces to test stains and paints before applying them to the real thing.
Next, learn the half lap joint. This joint is useful for box dividers. For example, create a shallow 4-inch deep box using the basic butt joint or the mitered butt joint in the corners.
Then, divide the box into four sections by adding two slats, using the half lap joint where they cross in the center.
With these three joints, you can create a lot of different woodworking projects!
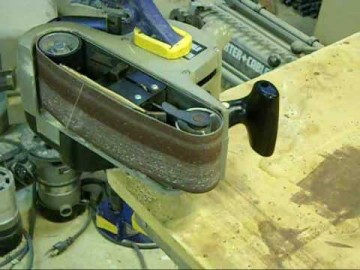
Use a Few Basic Hand Tools
Old timers did all their woodworking with hand tools. They built entire houses and barns with them. They filled them with furniture and cabinets. Mentioning this is not recommending you plan to build a house with hand tools. However, it is good to know it can be done.
If you are not already proficient with power tools, you might want to make a project or two with hand tools. Take your time to get a feel for the wood and how it responds to saws, nails, screws, sanding, painting and staining.
Most beginner projects can be done with just these hand tools:
- hand saw
- hammer
- screwdriver
- ruler
- simple miter box
- miter square
- pencil
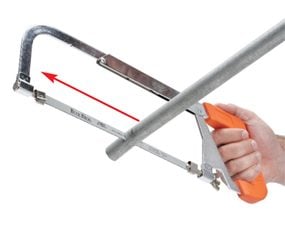
 Take a look at the cross-cut hand saw. It is designed to cut wood across that grain and leave a smooth finish. You can purchase a cross-cut hand saw at any large hardware store and it will work well for these projects.
The screw driver should match the screws you will use. If you are not sure which screws will work best, ask the hardware store clerk to help you choose the right ones.
Since most screws need Phillips-head screwdrivers, get a screwdriver that fits well into the heads of the screws you will be using. Phillips-head screwdrivers have the cross pattern, not the straight-line pattern.
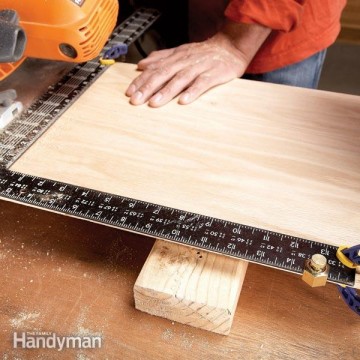
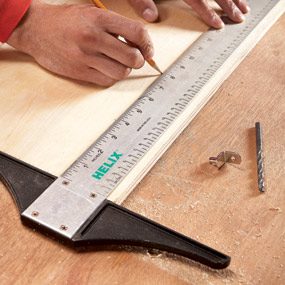
Additionally, the best ruler for a beginner who is making some beginner woodworking projects is a metal 36″ yardstick.
A simple miter box is very handy for making mitered corners of boxes or picture frames. You can purchase an inexpensive plastic miter box wherever the cross-cut saw is sold.
Recognize that Fine Wood Gives a Professional Look
For first projects, you might decide to use inexpensive wood. However, be aware that specialty wood can make the project look really stunning.
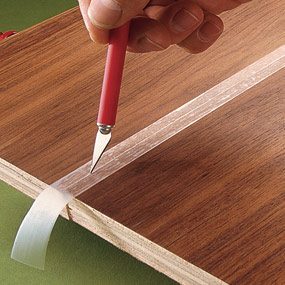
Some fancy wood is veneer. That is, there is just a thin layer of specialty wood covering the front surface of the sheet.
Most lumberyards carry 1/8-inch birch panels in their plywood section. This is not expensive and can look beautiful if the correct finish is applied.
Below are two pieces of pine boards – the one on the left is the better quality (compared to the knottier one on the right):
 Making a Simple Box – Woodworking Tips
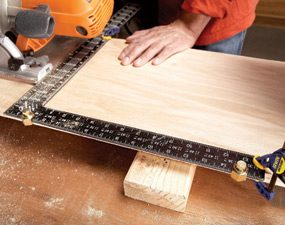
- Start by building the sides of a shallow box. You can use either the basic butt joint or mitered joint for this. The sides can be made out of a 3-1/5-inch or 4-inch wide pine board.
- Cut a piece of birch panel for the bottom of the box. Use tack nails and glue to create the bottom of the box. Make sure the corners are at a perfect 90-degree angle so that the box is perfectly square.
- Create a picture frame that fits on top of this box.
- Cut and insert a piece of birch paneling into the picture frame. Glue it into the picture frame.
- Sand any rough edges down with very fine sandpaper. Wipe every bit of dust and grease off the box and cover.
- Coat every part of the box with sanding sealer. This ensures that the final finish looks even and not blotchy.
- When the sanding sealer is dry, apply a nice light stain or clear polyurethane finish to your box. Test the finish on scraps of the different types of wood you used for the box to see if you like it.
Congratulate yourself on making a very nice, custom project. Use the box to hold your small hand tools, watches or give it as a gift.
Fine-tuning a Few Basic Skills
Once you have made a few projects with hand tools, you should have a good feel for how the wood responds to you and your tools.
Your confidence has improved. You are now ready to learn the skills needed to use some basic power tools for your woodworking projects.
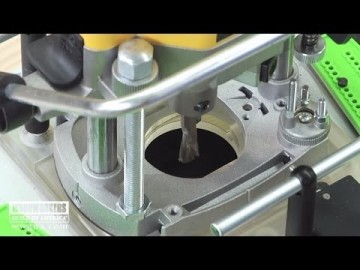
Start with the power drill. First, you will also need a tiny drill bit that you can use to make pilot holes before screwing boards together. Pilot holes help prevent the wood from splitting and allows the screws to go into the wood straighter and with less effort.
Then, you can put the screws into the pilot holes with your handheld screwdriver or you can put a screwdriver bit into your electric drill and zip the screws into the wood in the blink of an eye.
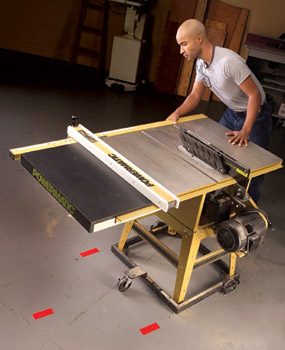
 Two power saws that are relatively safe for beginners are handheld jigsaws and scroll saws. These are much safer than circular saws, chop saws or table saws.
Start with a handheld jigsaw. Buy a small variety of blades designed for wood (not metal). Read the instructions that come with the saw and practice putting the different blades into the saw. Get a feel for how tight the set screw should be to hold the blade securely.
Woodworking is a great way to forget the troubled outside world, and enjoy the work of your own hands. Always use your safety equipment – sight protection, hearing protection and gloves. These God-given tools are irreplaceable.
Choose simple projects in the beginning. Feel free to make several of the same item, getting better each time. Practice the basic skills and add new ones when the first ones are mastered.
Woodworking is a time-honored tradition that brings challenges and victories. If you have decided to take up woodworking, you have chosen wisely.
Paul is an avid woodworker and the editor-in-chief of the website Woodworkboss.com. Via his site, he hopes to inspire fellow woodworking enthusiasts while sharing tips and ideas for woodworkers who are starting their crafting journey.